McMaster-Carr Catalog Electric Longboard
Get there faster with McFaster.
After hearing my friends say "if you want to get it faster, order it on McMaster" one to many times, I had a revelation - it would be really funny if I could places faster using a vehicle made out of a McMaster catalog.
Enter McFaster.
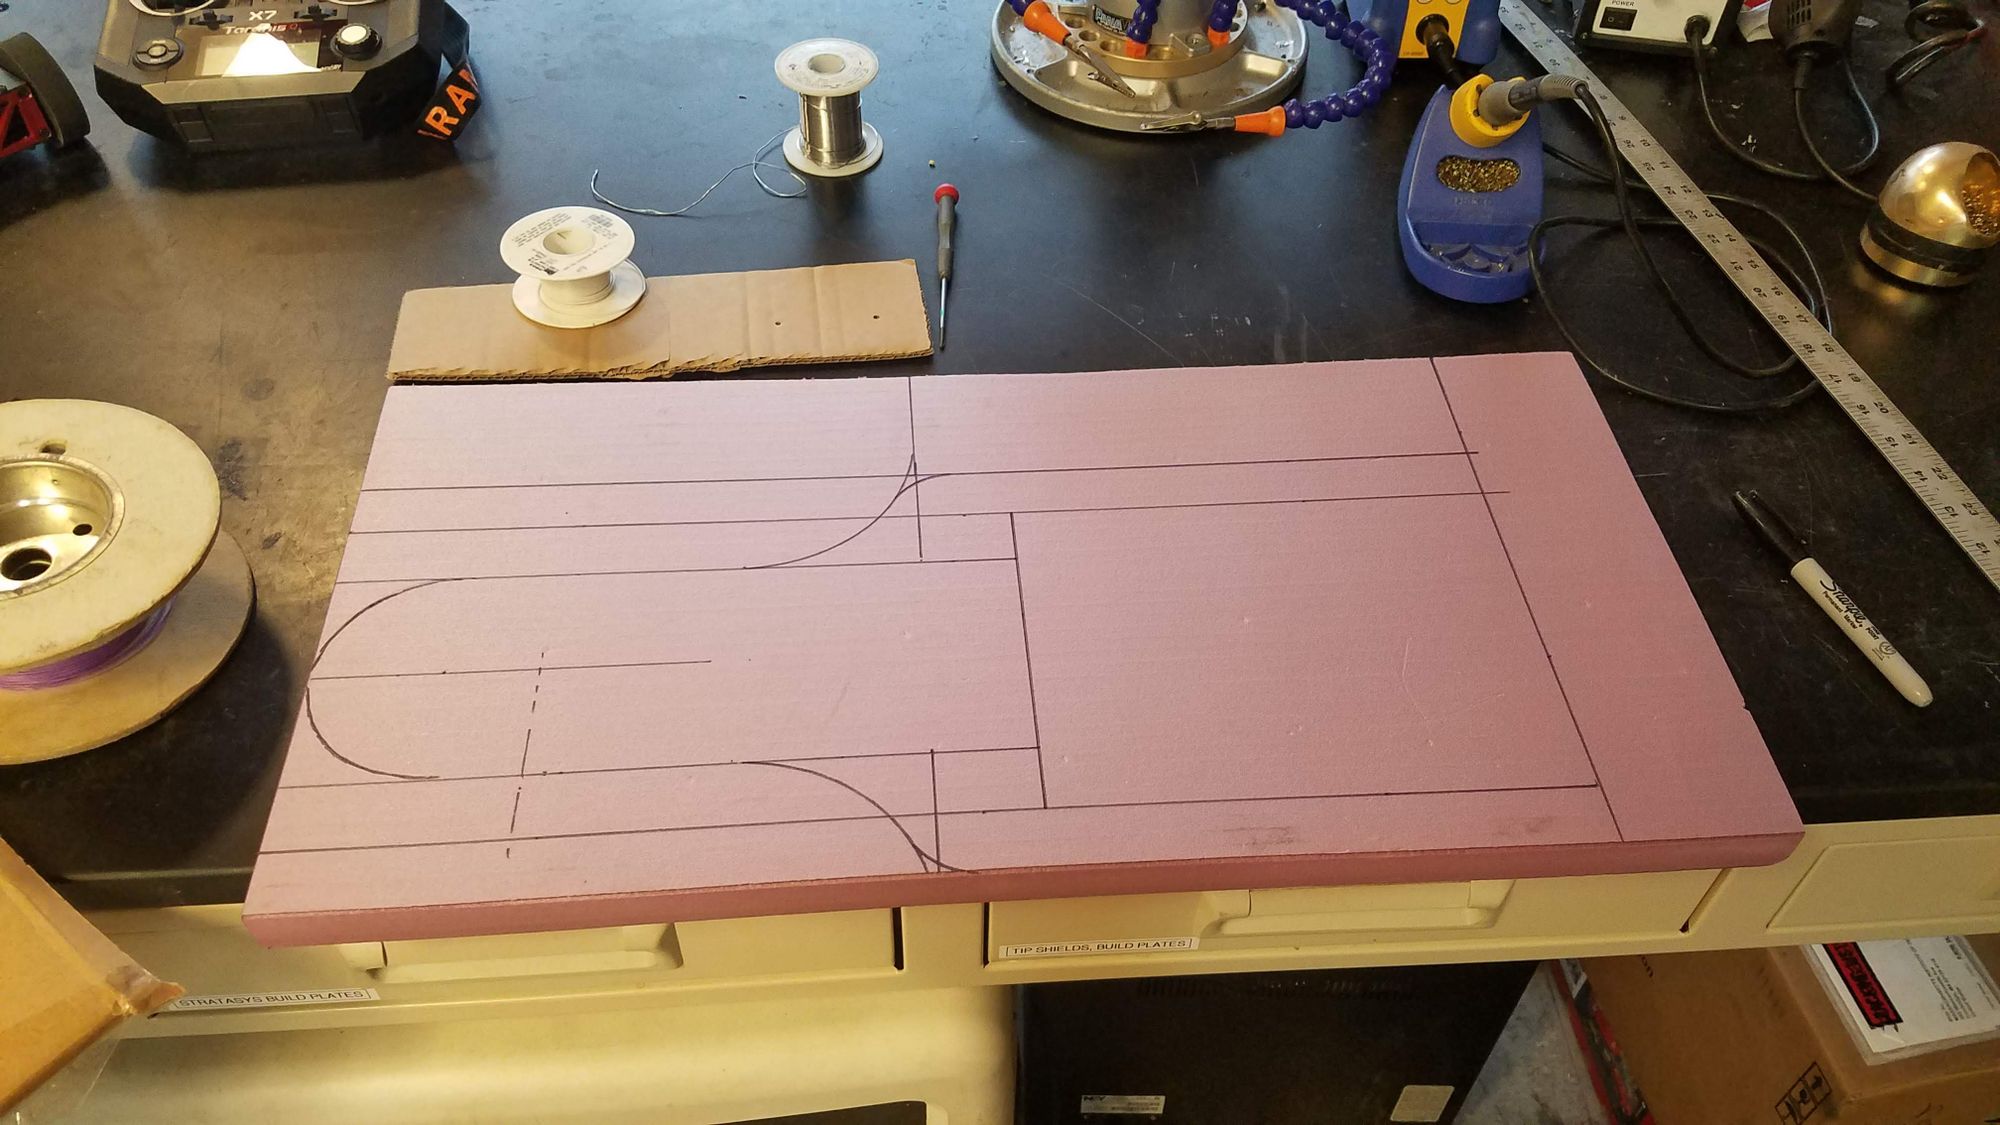
I started with some sheets of foam insulation from Home Depot, on which I drew out half of my board. I then used the bandsaw to cut the shape out and reduce the sheet in thickness by sawing it half. I copied the half that I just made onto the other sheet of foam I had and repeated the process.
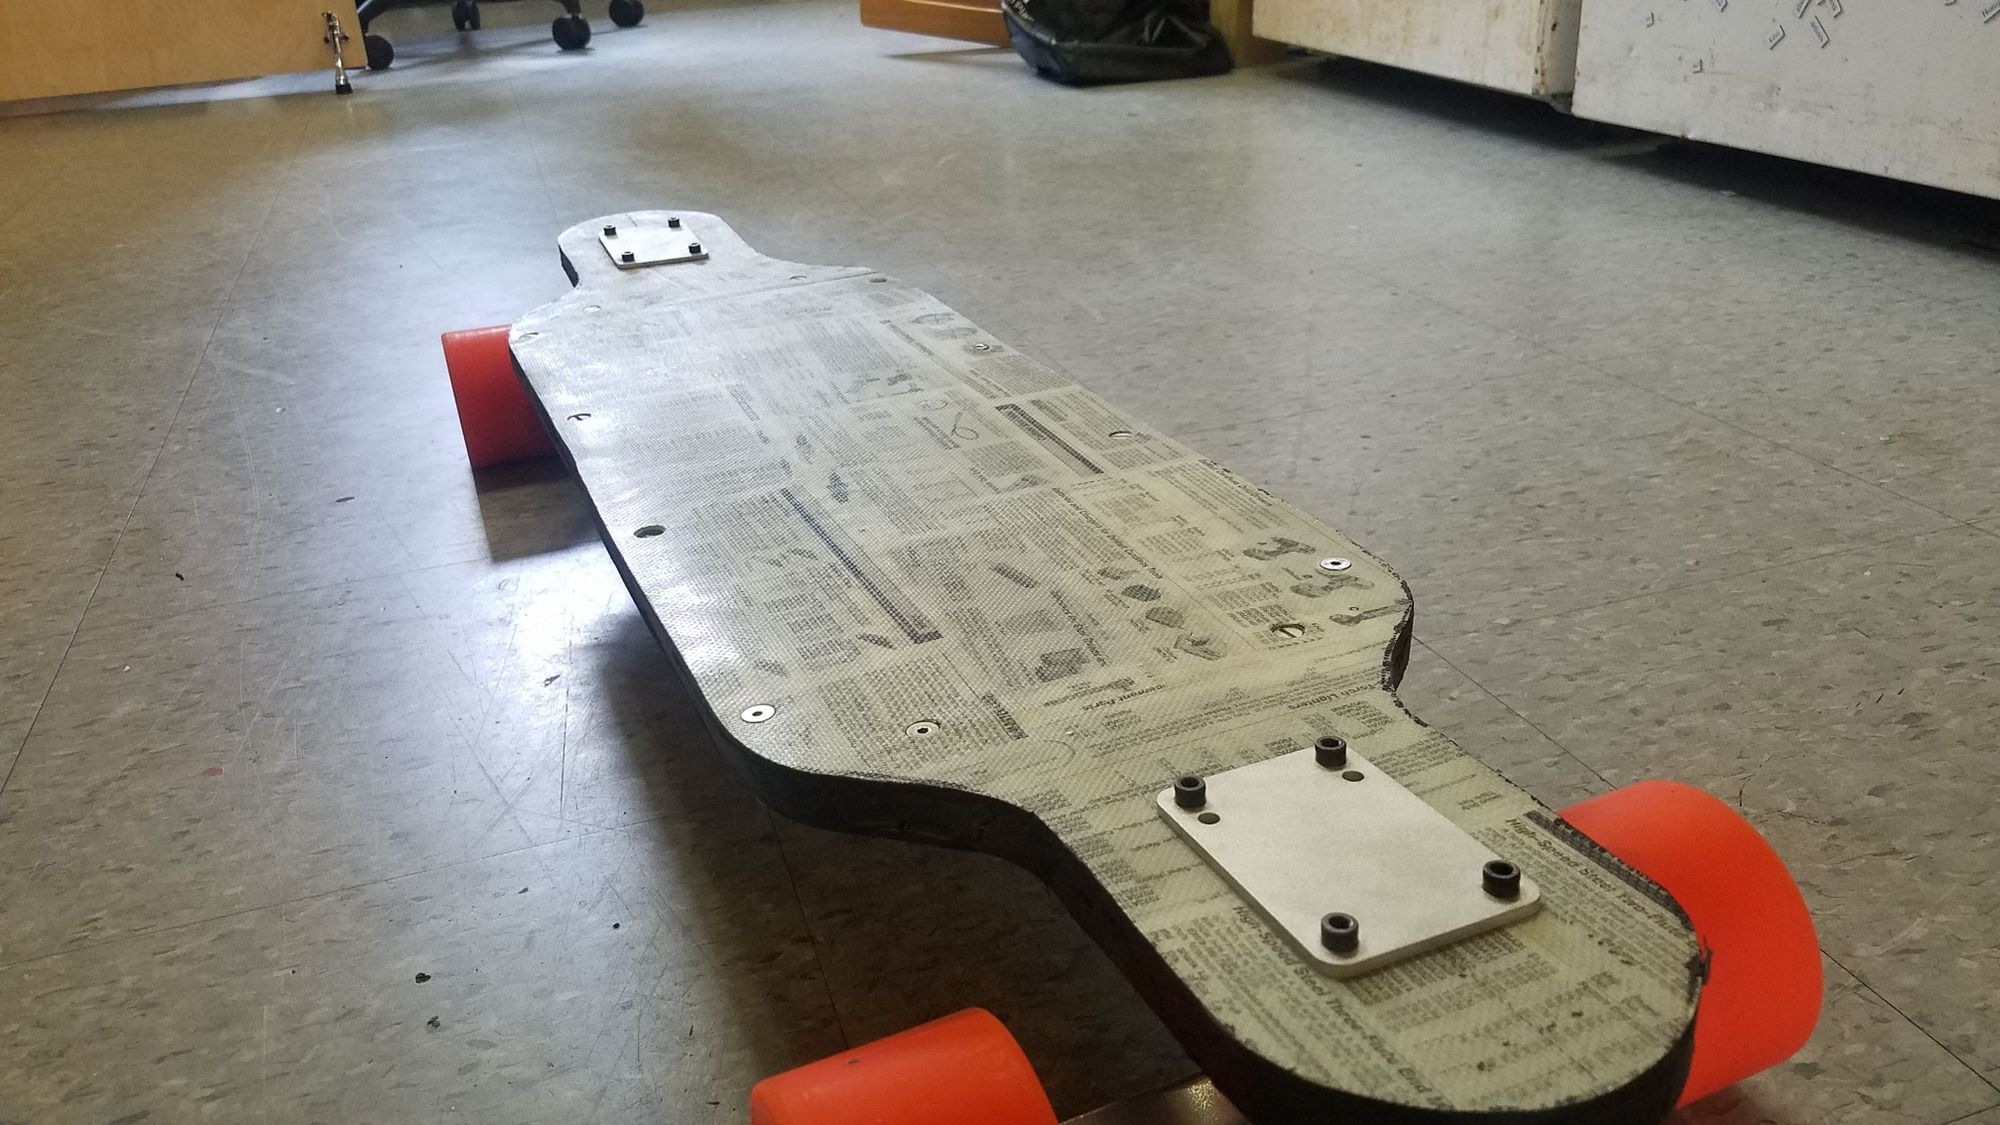
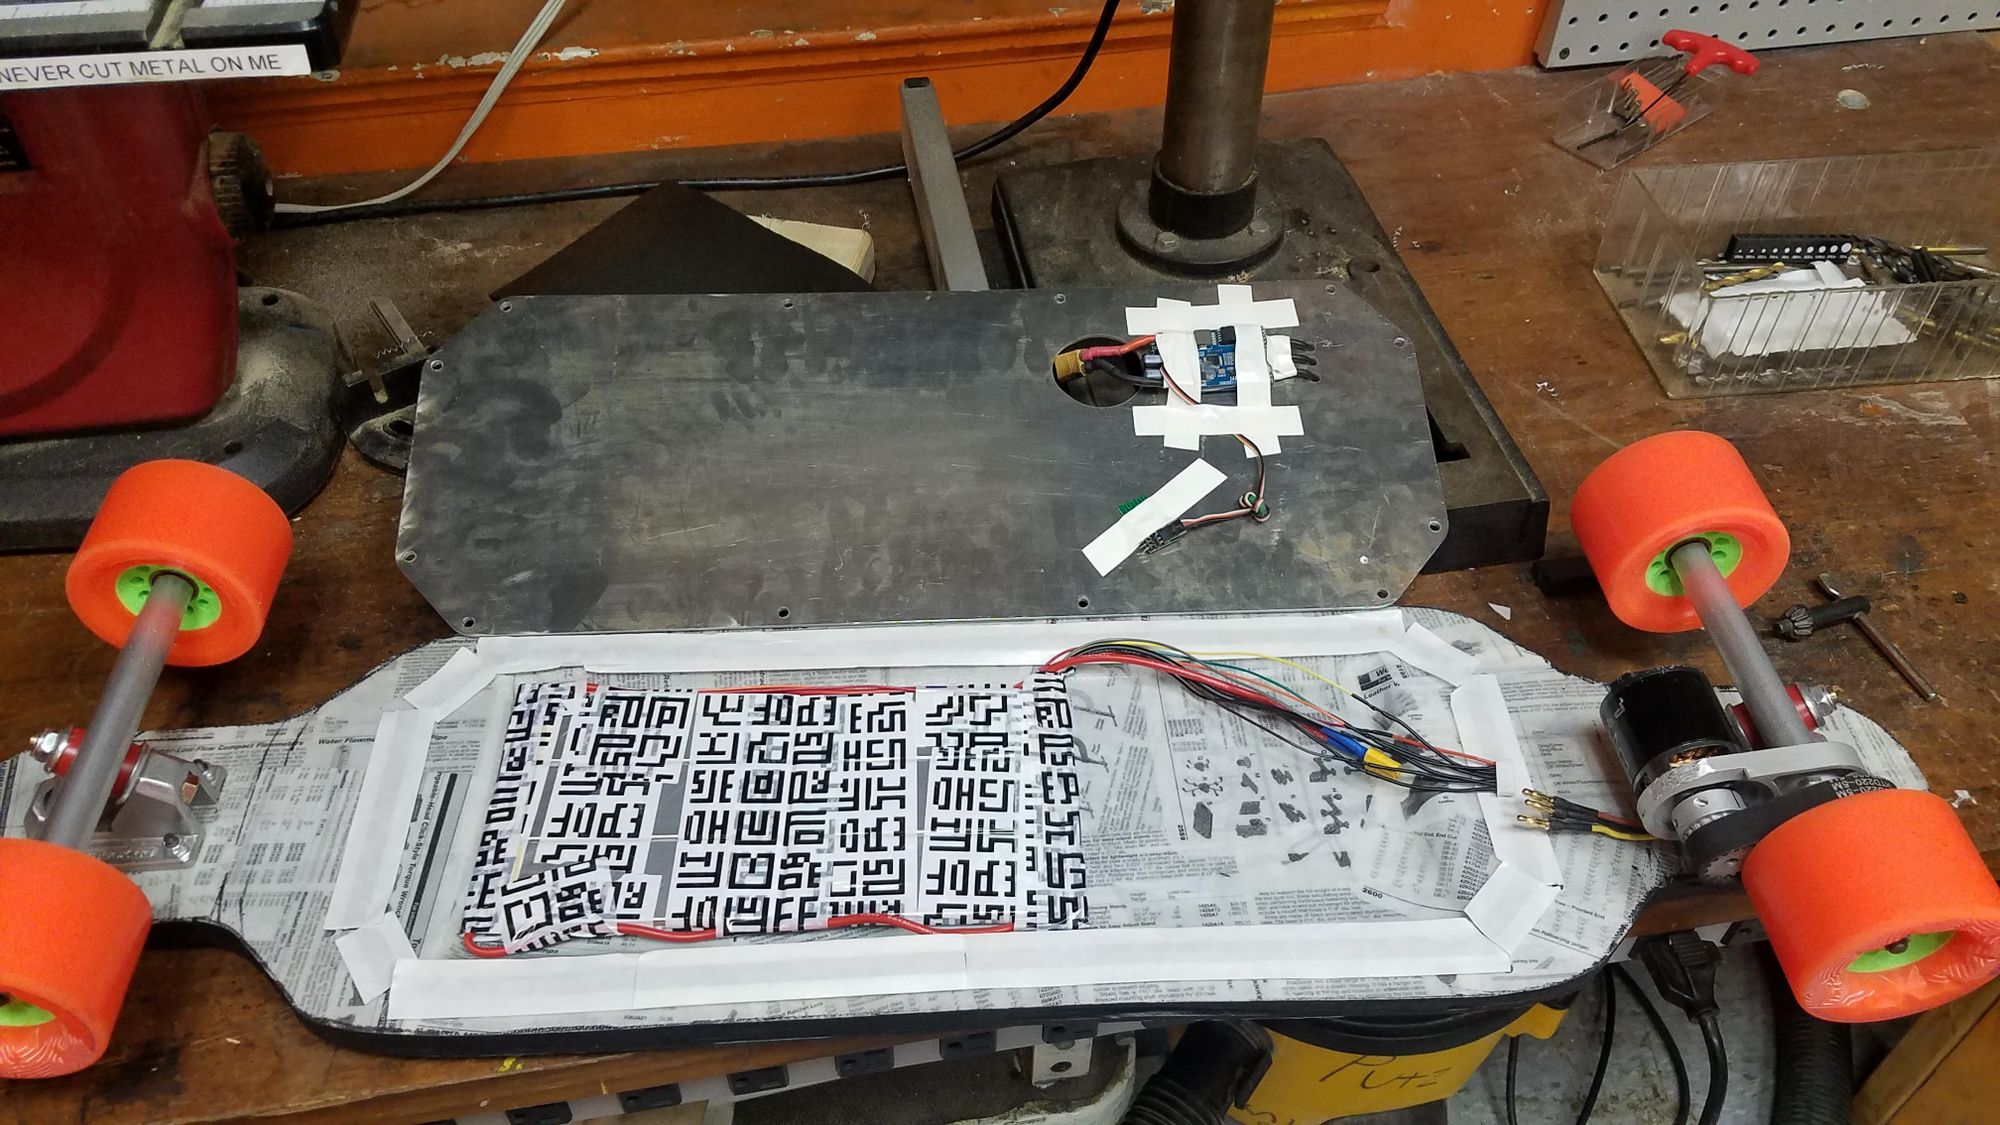
The plan was to do a composite sandwich construction, with the foam surrounded by layers of McMaster catalog pages and fiberglass. This construction method also allowed me to include a pocket in the middle of the board for all the batteries and electronics.
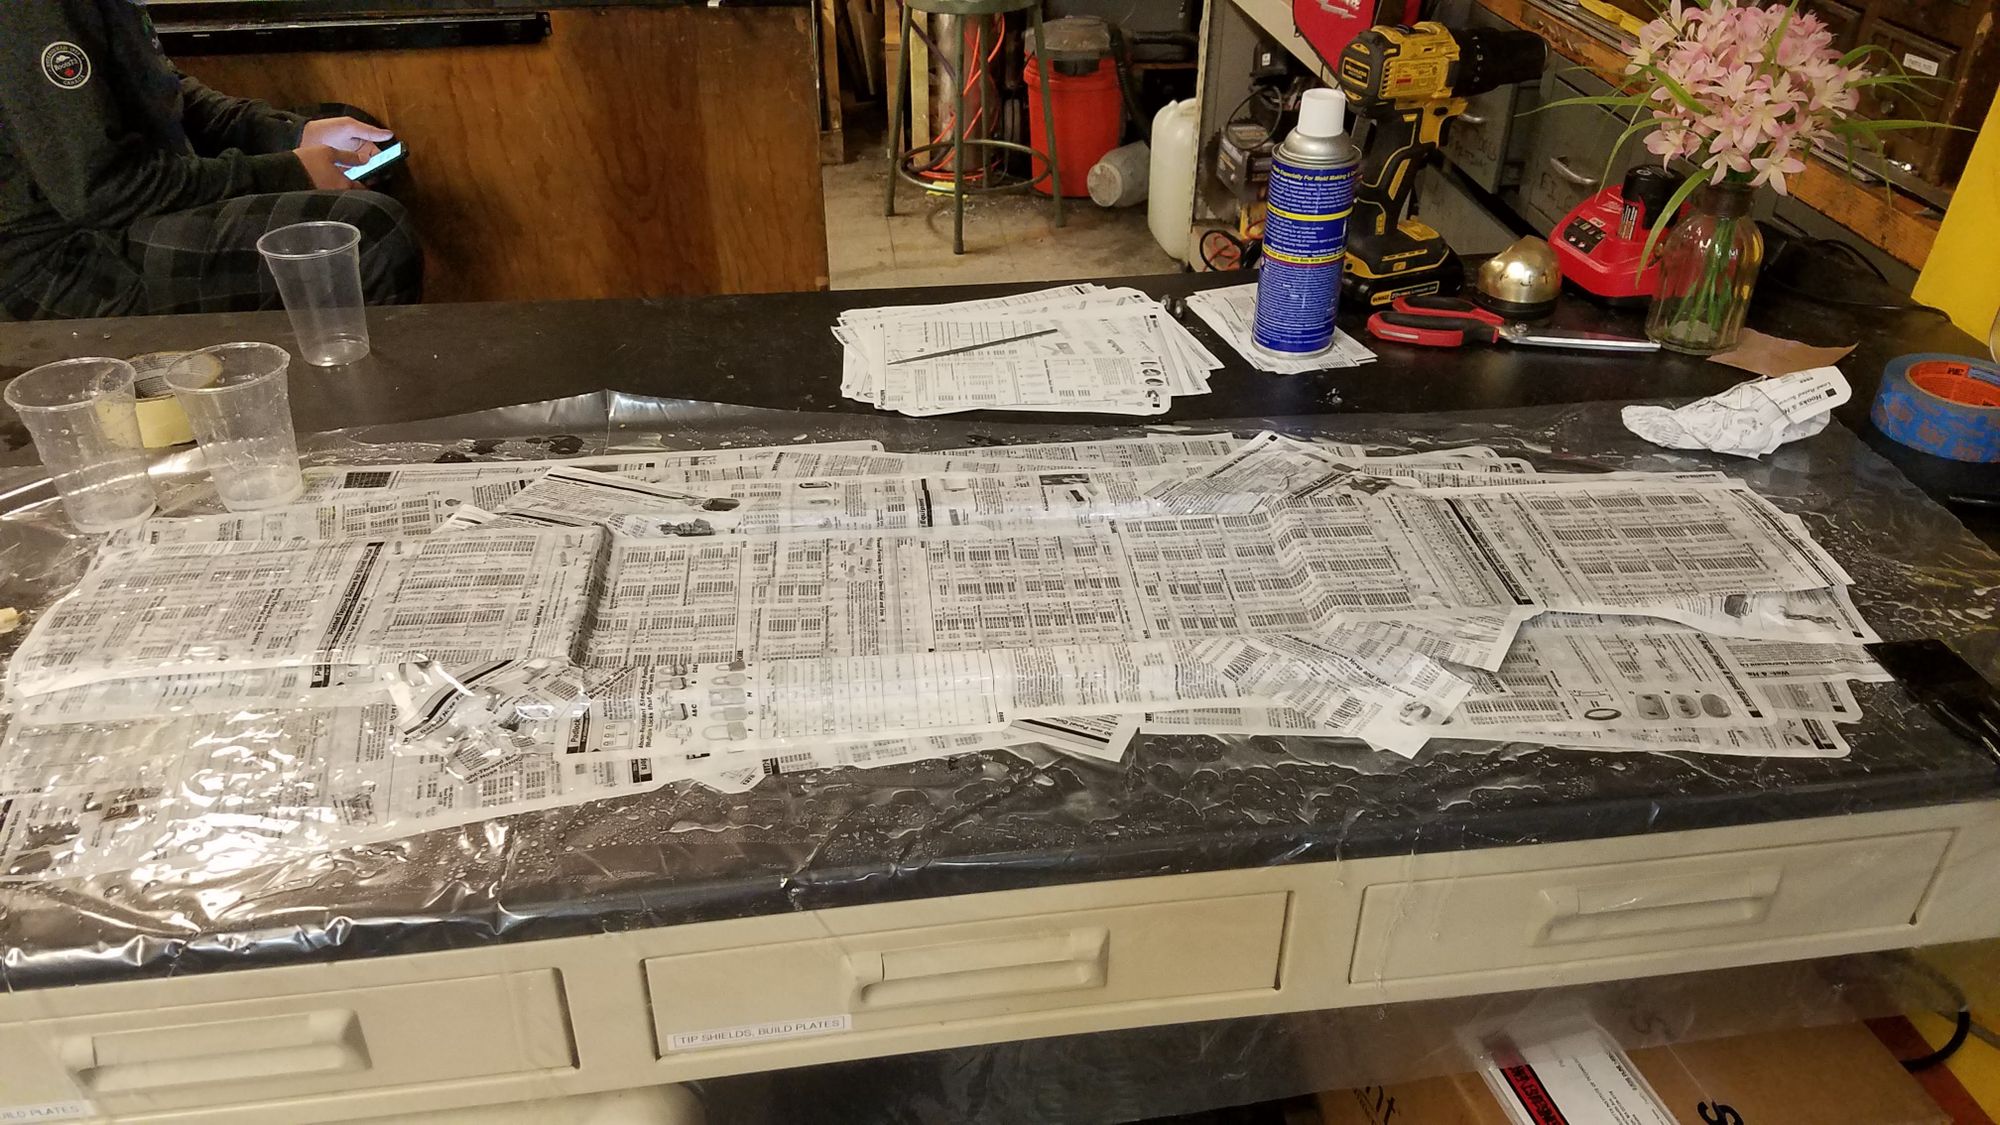
I started doing the layup with just the catalog pages, but quickly realized that the resulting structure was way to weak. I then switched to doing a couple layers of fiberglass every day, testing the flex of the board after it dried. Once the board reached the proper stiffness, I added another layer of McMaster catalog pages and fiberglass, as the fiberglass became sorta cloudy after many layers were built up and the original pages were no longer very legible. Barring a couple of times where the epoxy decided to go thermonuclear and melt the mixing cups, the board construction went a lot smoother than expected.
After everything was dried, I cut away most of the excess material with an angle grinder and sanded the rest flush with the foam. I then painted the sides with some black latex house paint to hopefully seal the exposed foam along the edges.
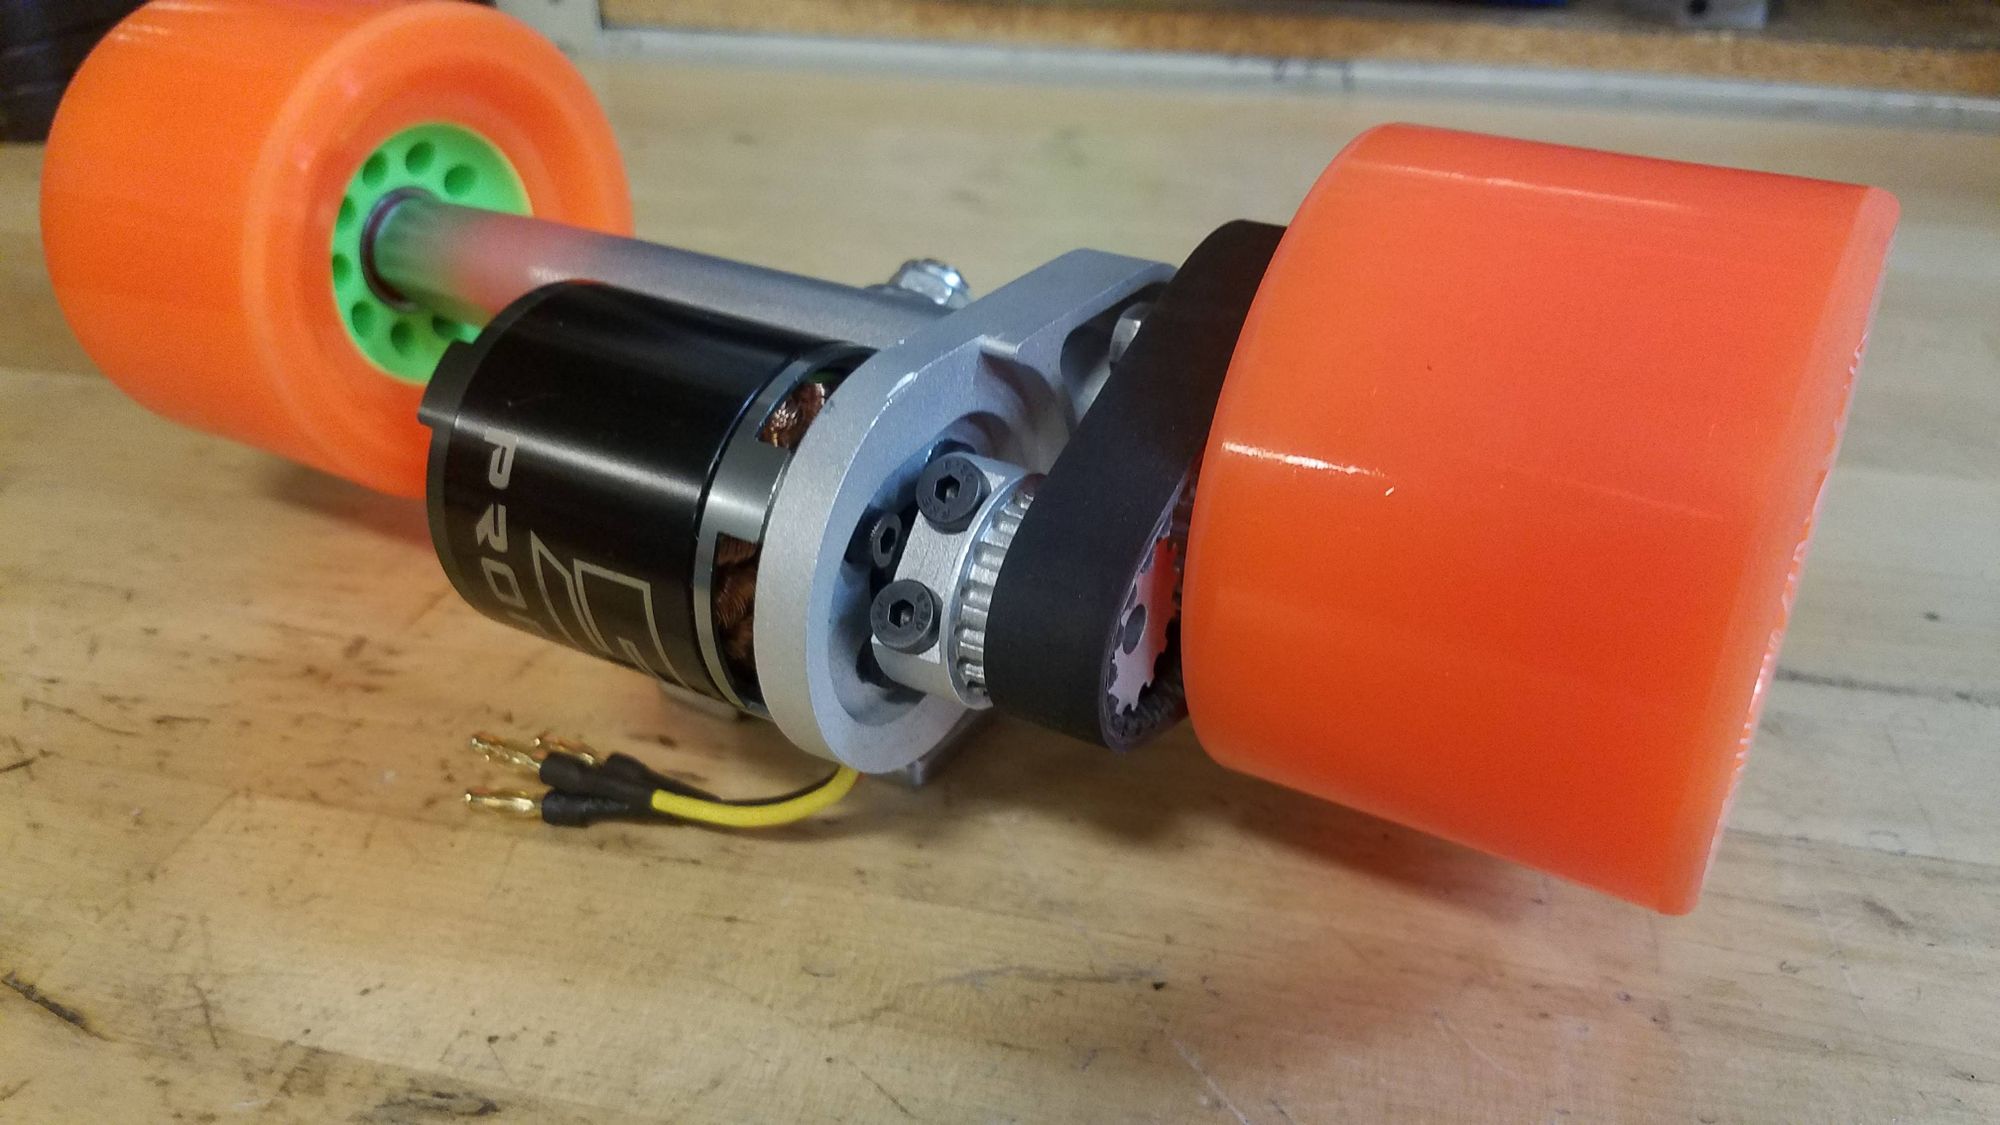
Now that the board was done, it was time to work on the drivetrain. After hearing multiple stories of 3D printed pulleys failing in spectacular ways, I decided to mill my own, taking inspiration from this video. Following the steps outlined by this post, I designed a 16t 5mm HTD pulley for the motor side and a 34t pulley for the wheel.
To machine the wheel side pulley, I started by spotting and drilling out all the holes for the teeth and the through bolts. I then machined a small shoulder to grab onto with the lathe, and roughed out most of the stock surrounding the pulley.

I then took it to the lathe, turned a little taper on the other side so it would fit into the wheel, flipped it, and turned down the section of the pulley that the belt meshed with until the belt fit nicely.
The final turning operation left a bunch of burrs on the pulley teeth, so I cleaned up as much as I could and took it to the sandblasting cabinet to make the teeth a little less sharp.
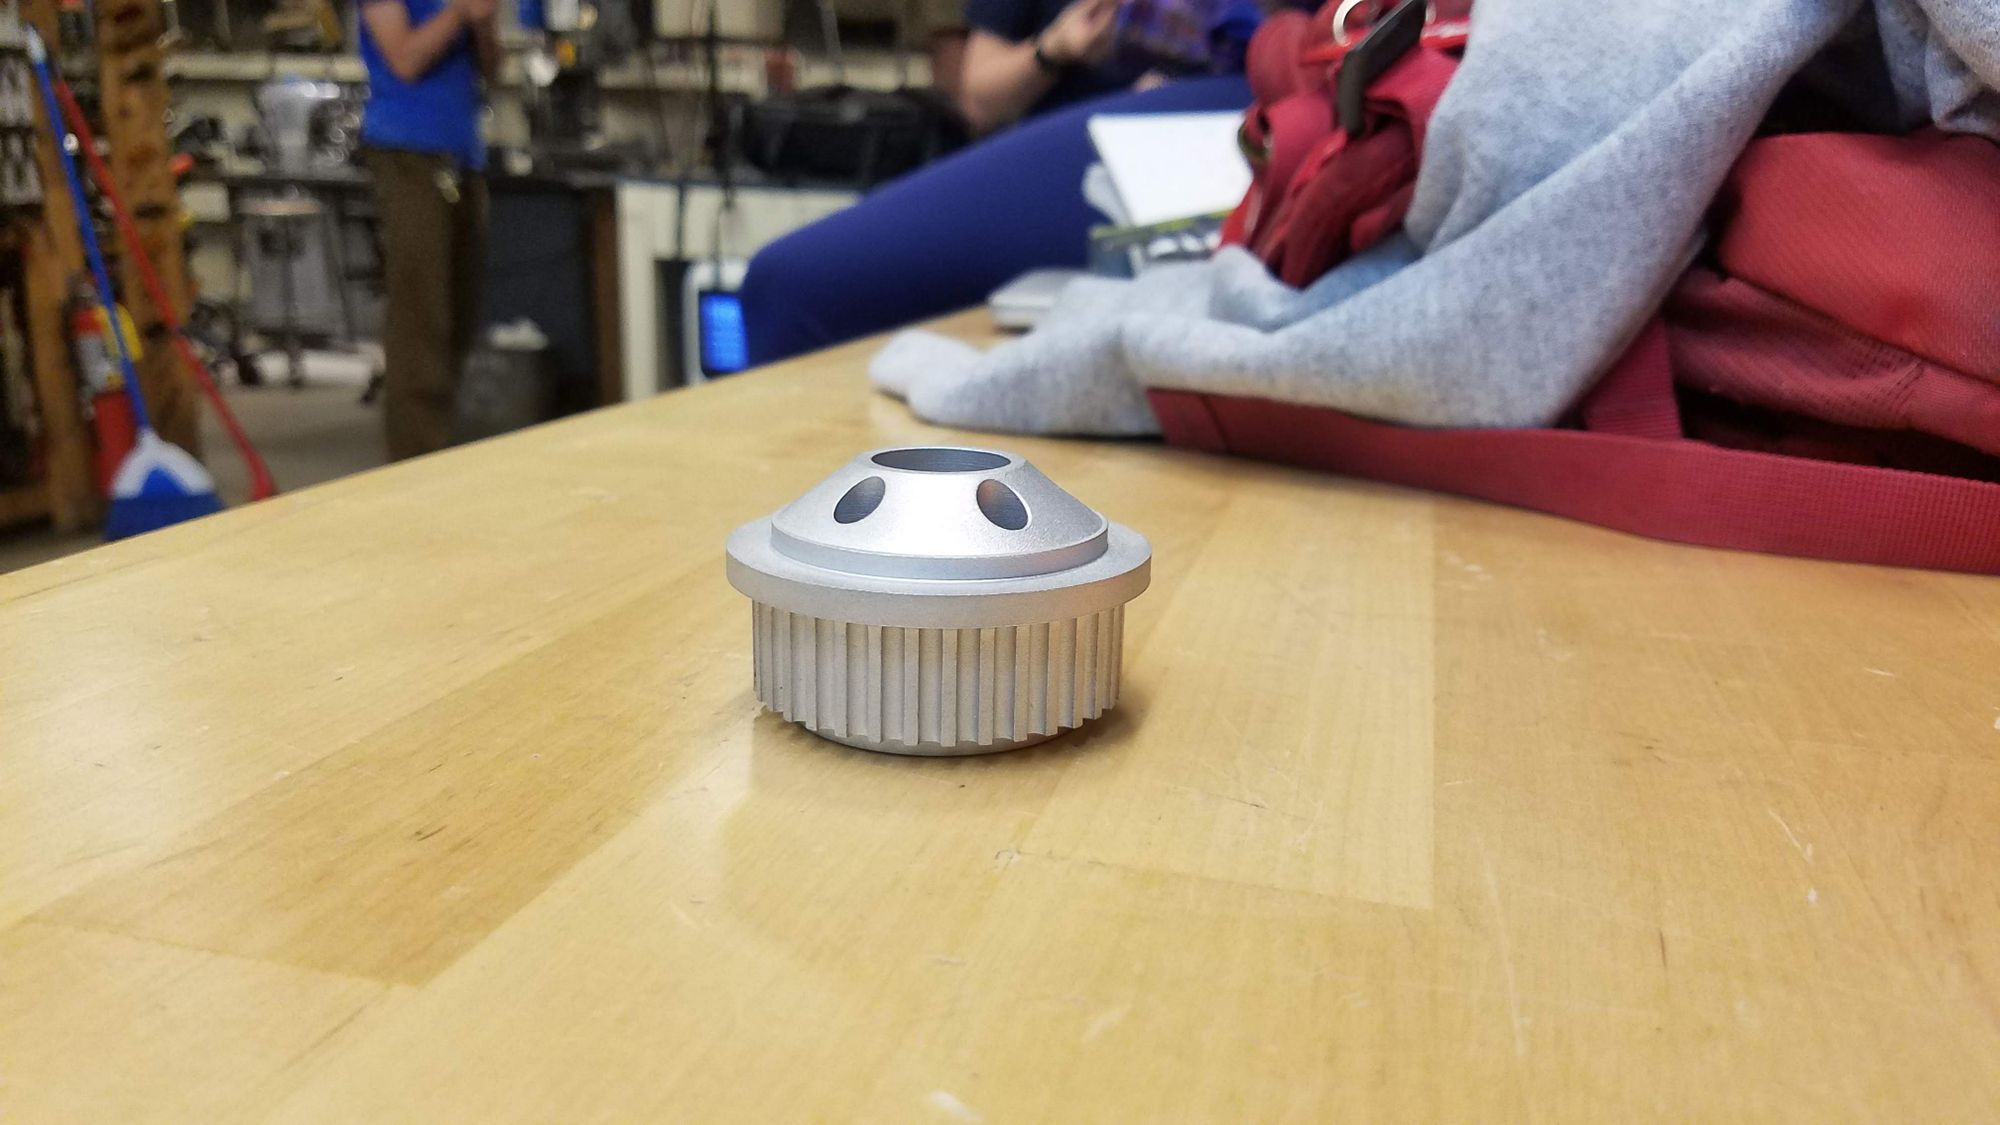
I did the same thing for the motor side pulley, but cut some clamping features on the other side instead.
The trucks, which looked pretty straight and square in pictures turned out to be anything but that, so I chucked it up on the lathe by one of the axles and turned down the truck until it was round.
Now that there was a nice surface on the truck, I designed the motor mounting plate. I chose the shortest belt length that made the motor clear everything on the truck and was readily available on Ebay. In an attempt to make the drivetrain look sleeker, I put the holes for adjusting belt tension behind the motor pulley, which unfortunately makes adjusting the belt tension kind of annoying. However, since the belt run is so short, I didn't expect a lot of stretching to occur, which means the tension only needed to be set once during assembly.
Since the board was rideable, I rode it around with the Lipos and controllers plastic wrapped to the bottom of the board for a couple weeks, until I almost ejected the batteries out from the board after going over some bumps. This gave me the motivation to finally order a bunch of loose 5Ah Lipo pouches from Hobbyking.
Once they arrived, I arranged them in the cavity that I had previously made in the bottom of the longboard, soldered them all together, and wrapped them in copious amounts of tape to insulate all the terminals. The heatsinks on the 100A Red Brick ESC that I was using had to be removed in order for it to fit in the pocket, so I used some thermal pads to heatsink the controller to the bottom retaining plate, which I waterjet out of 1/8" aluminum. I also had to bend a couple of pins on the radio receiver and remove its plastic housing for it to fit. I drilled and countersunk holes in the board to match the holes in the aluminum, ran some adhesive-backed gasket around the entire pocket to waterproof it, routed the wires for the motor through the bottom plate, and bolted the entire thing together.
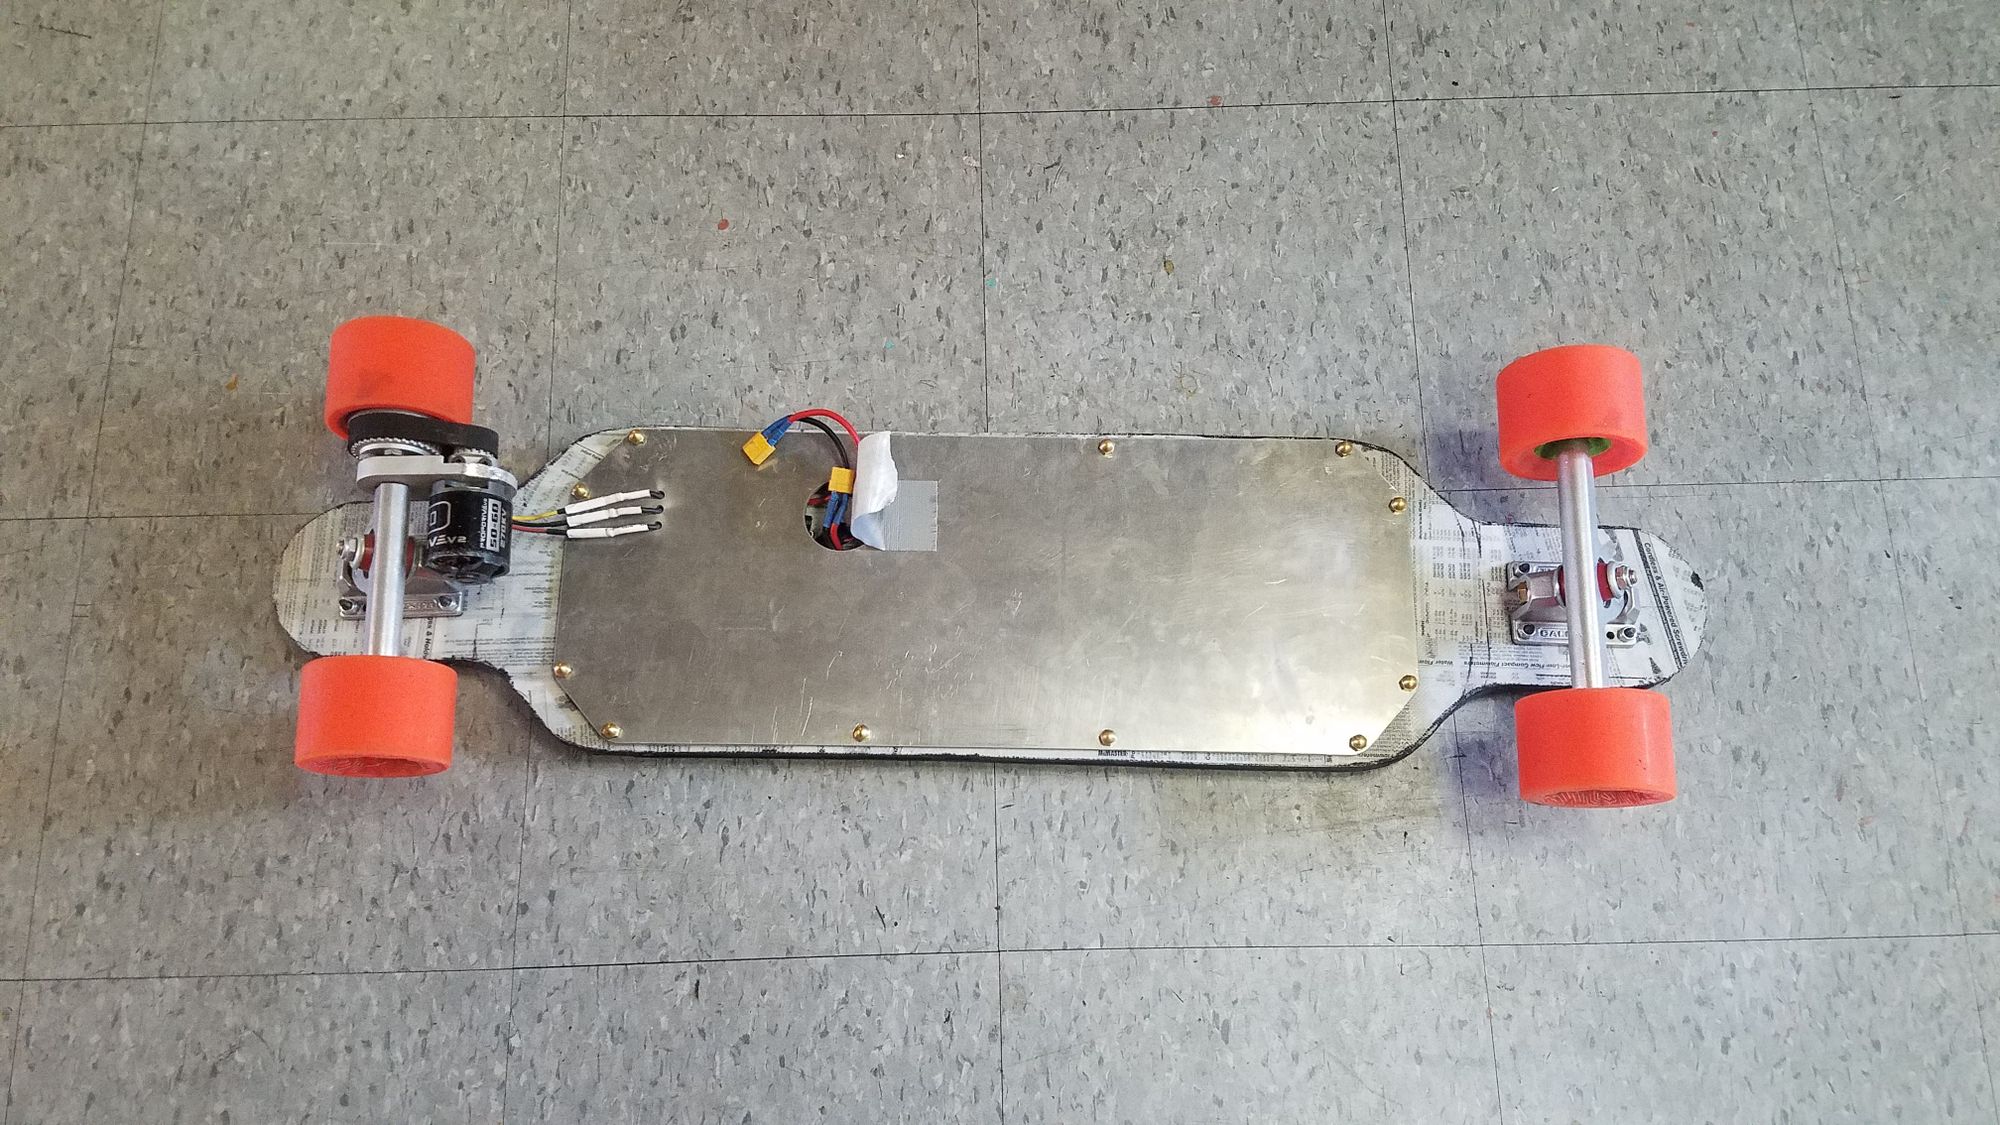
The aluminum plate ended up adding quite a bit more stiffness to the board, but I found that it made riding the longboard much less scary when going fast. I think the increased stiffness made it a bit harder to turn - making the board more stable.
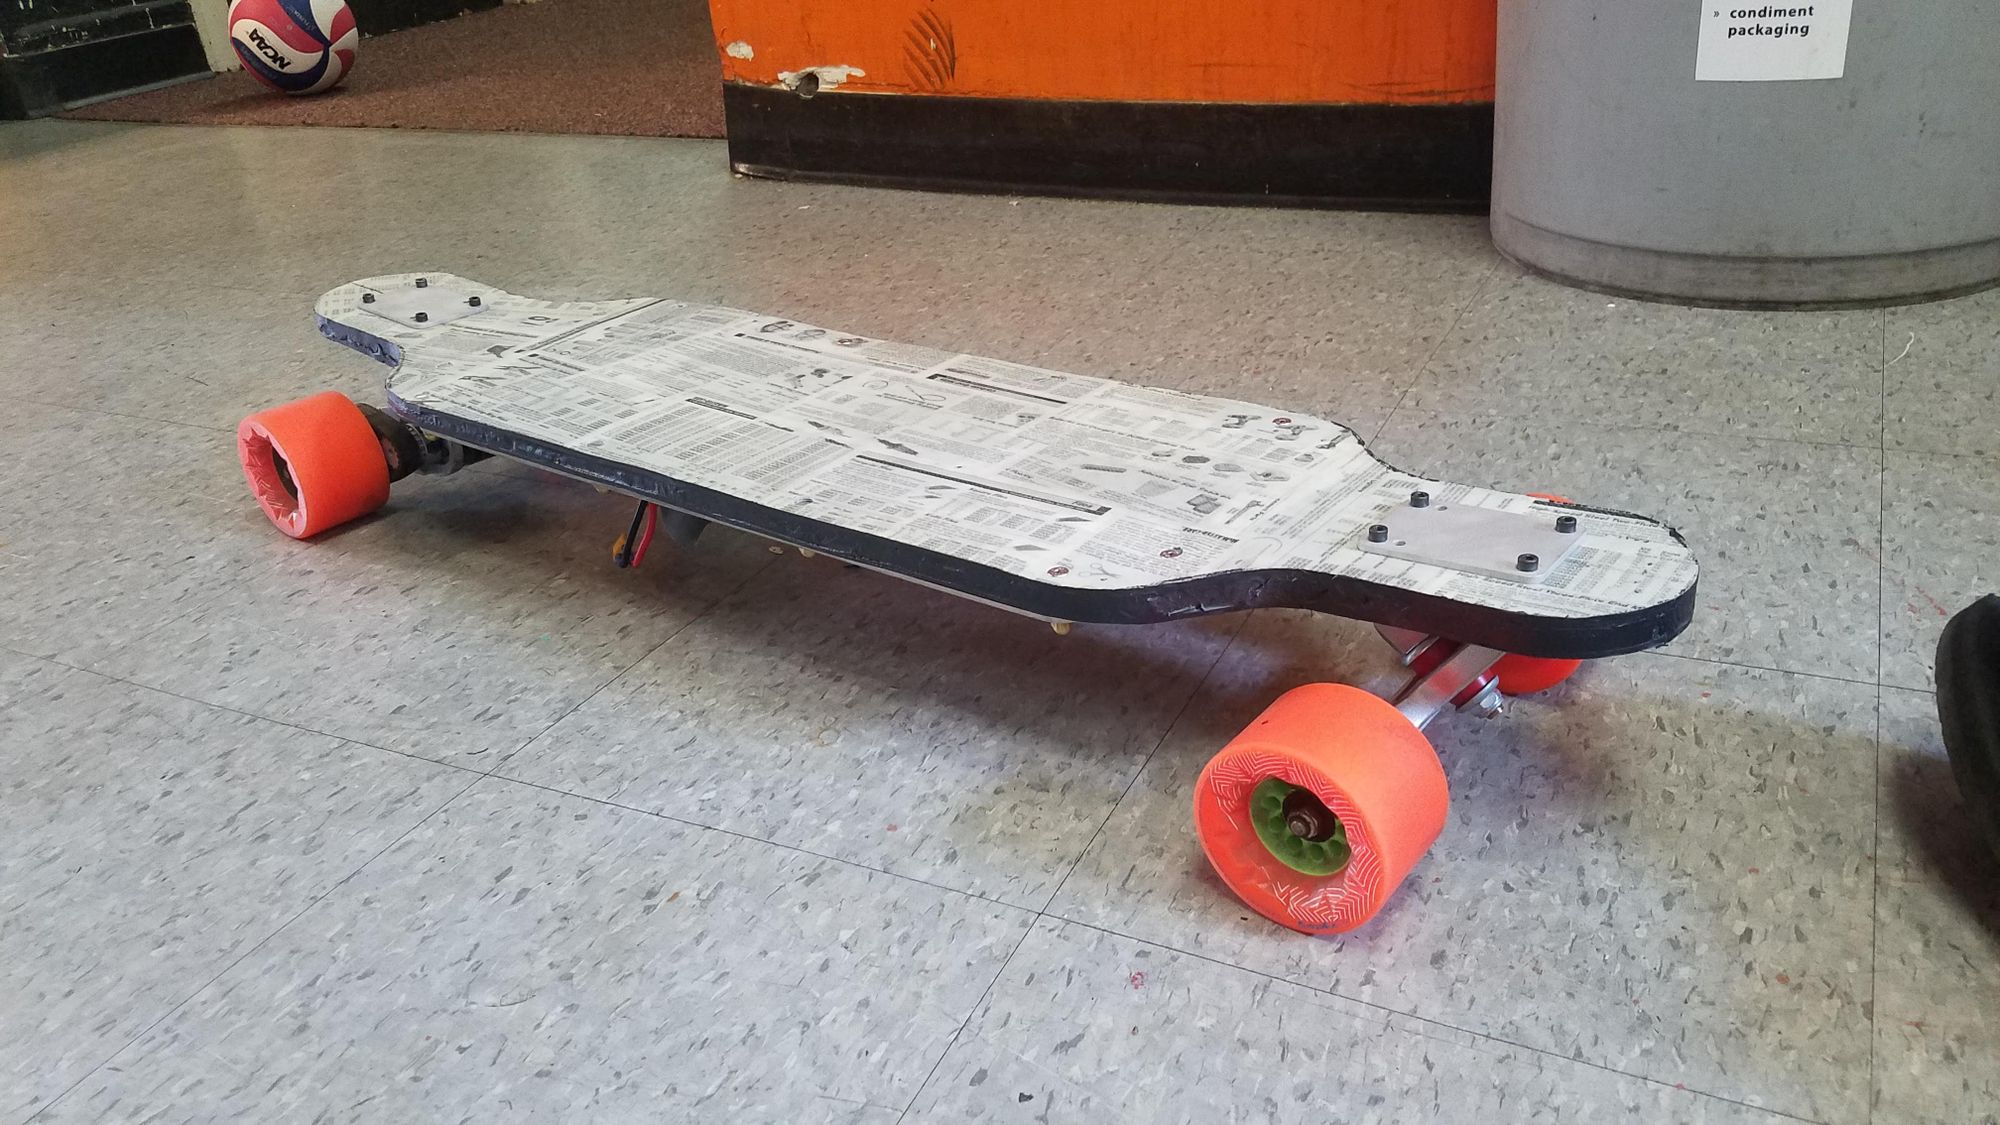
Because of its relatively wide wheelbase, you can accelerate pretty hard on McFaster, as long as you get the board rolling before you get on it to minimize the amount of bad sensorless startup. I've been riding it around for the past couple of weeks, and I've been able to match some of my friends on their scooters, although I am perpetually in fear of going over a large bump and falling off.