Electric, Sound Reactive Ukulele
There's engineering! and art! and science!
This semester, I've been taking the Engineering, Art, and Science seminar (EC.A790) as my freshman advising option. As part of the seminar, we were required to work on a "personally compelling" project of our choice in small groups.
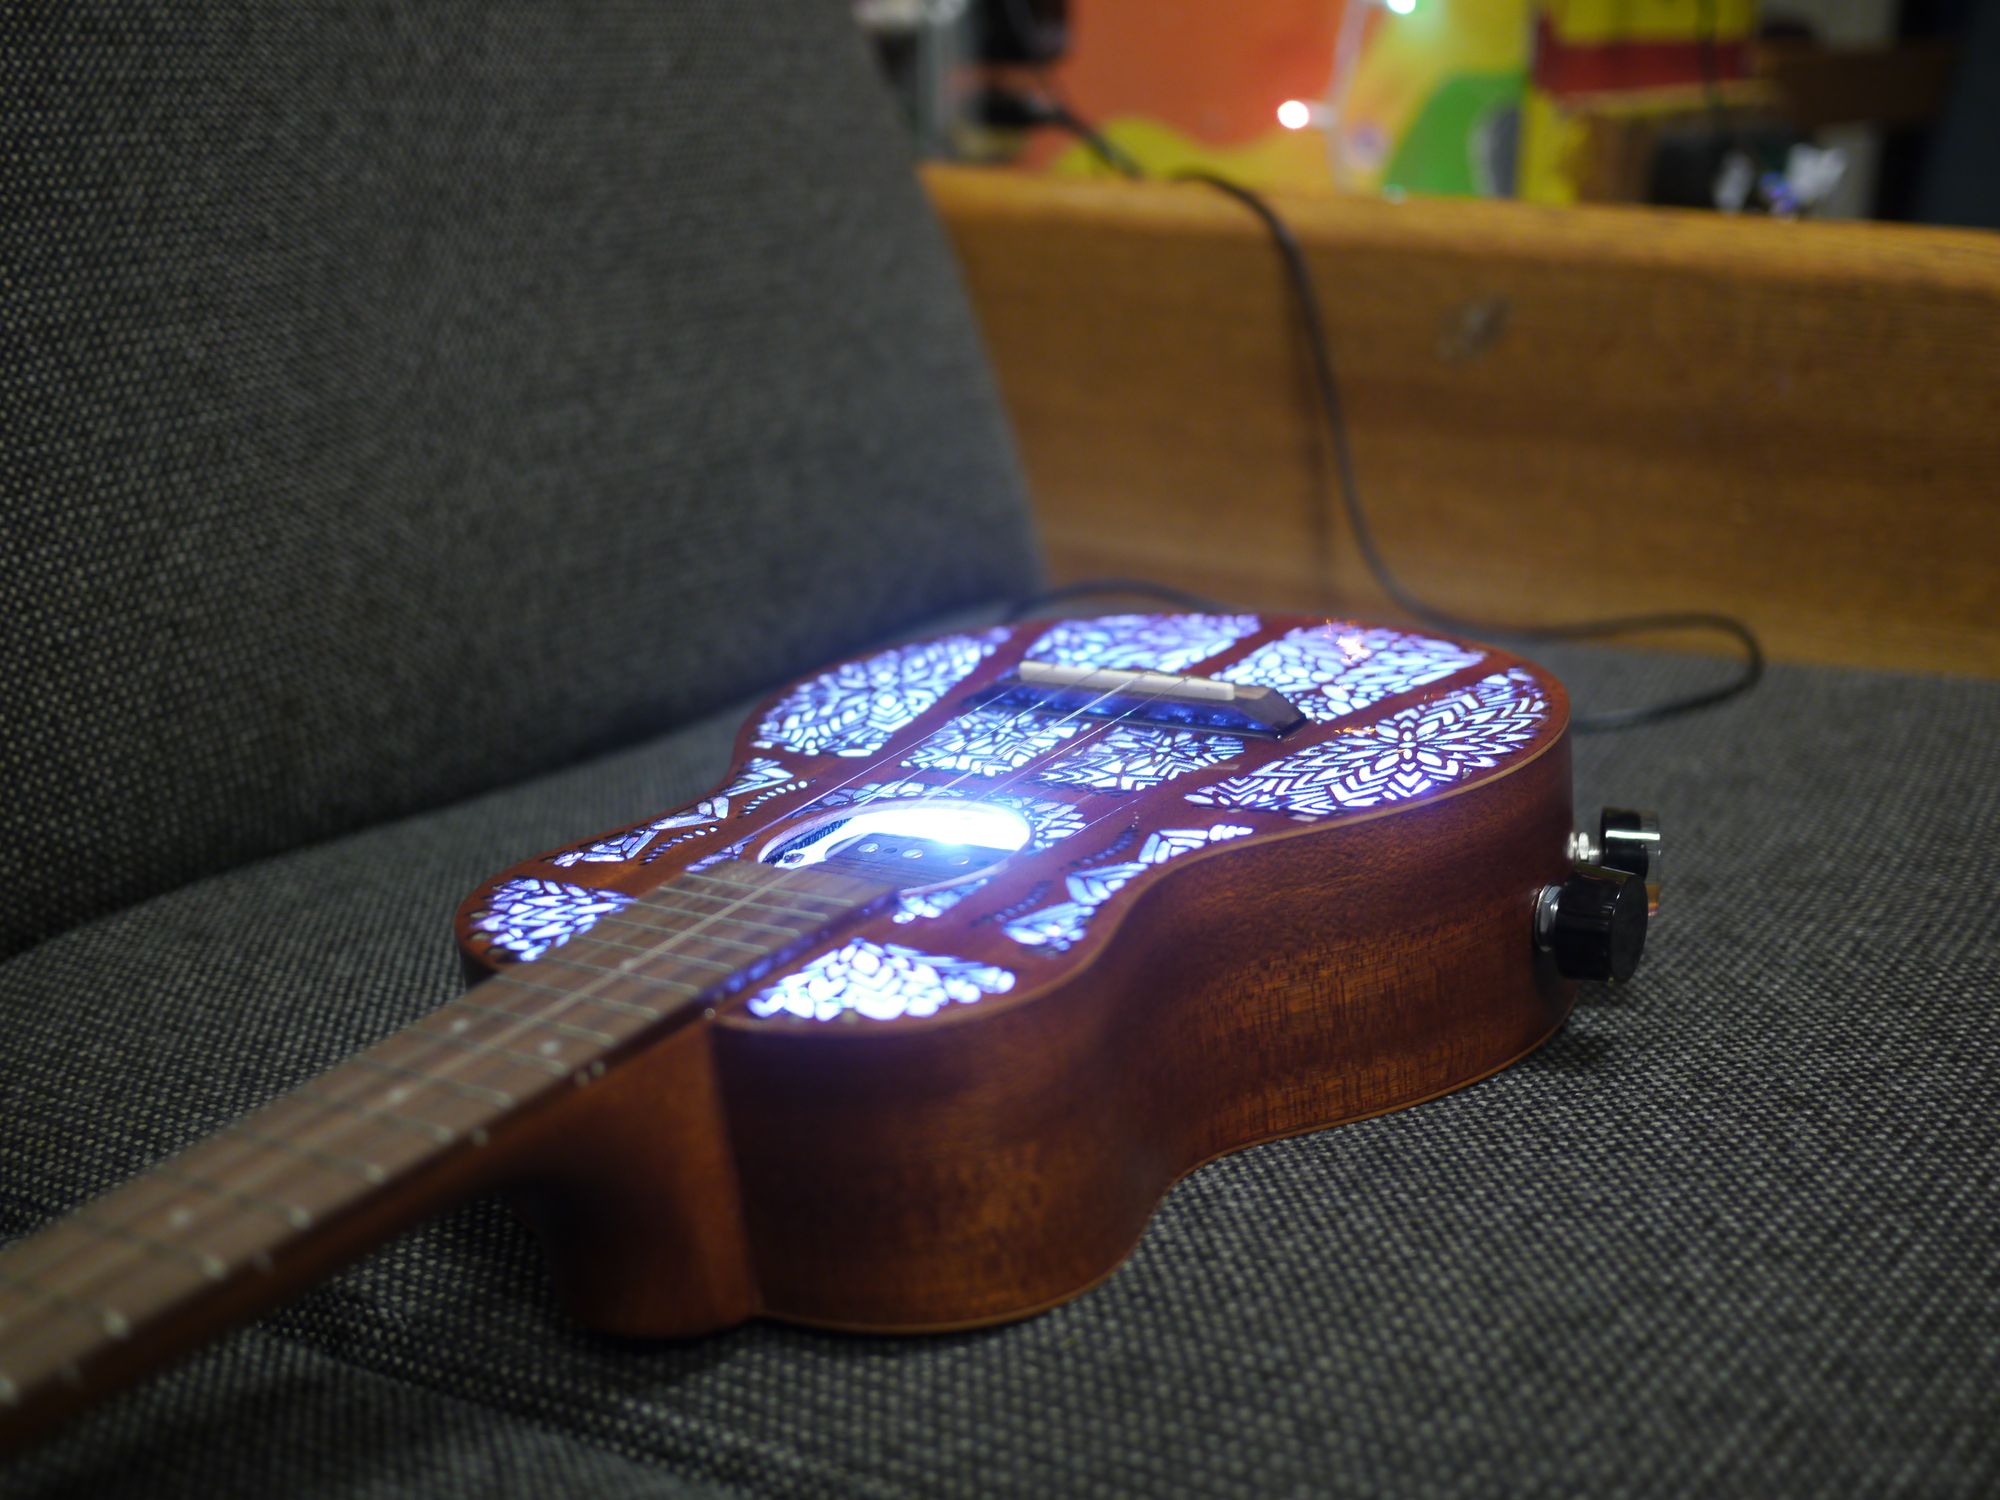
I ended up working on an electric, sound reactive ukulele. We wanted to have some LEDs in the resonating chamber of the ukulele change to respond to both the intensity and the frequency of the music being played.
I started by taking a few reference photos of the ukulele to trace its outline in Coreldraw and drew out the pattern for the front by cropping a multitude of floral patterns found online.
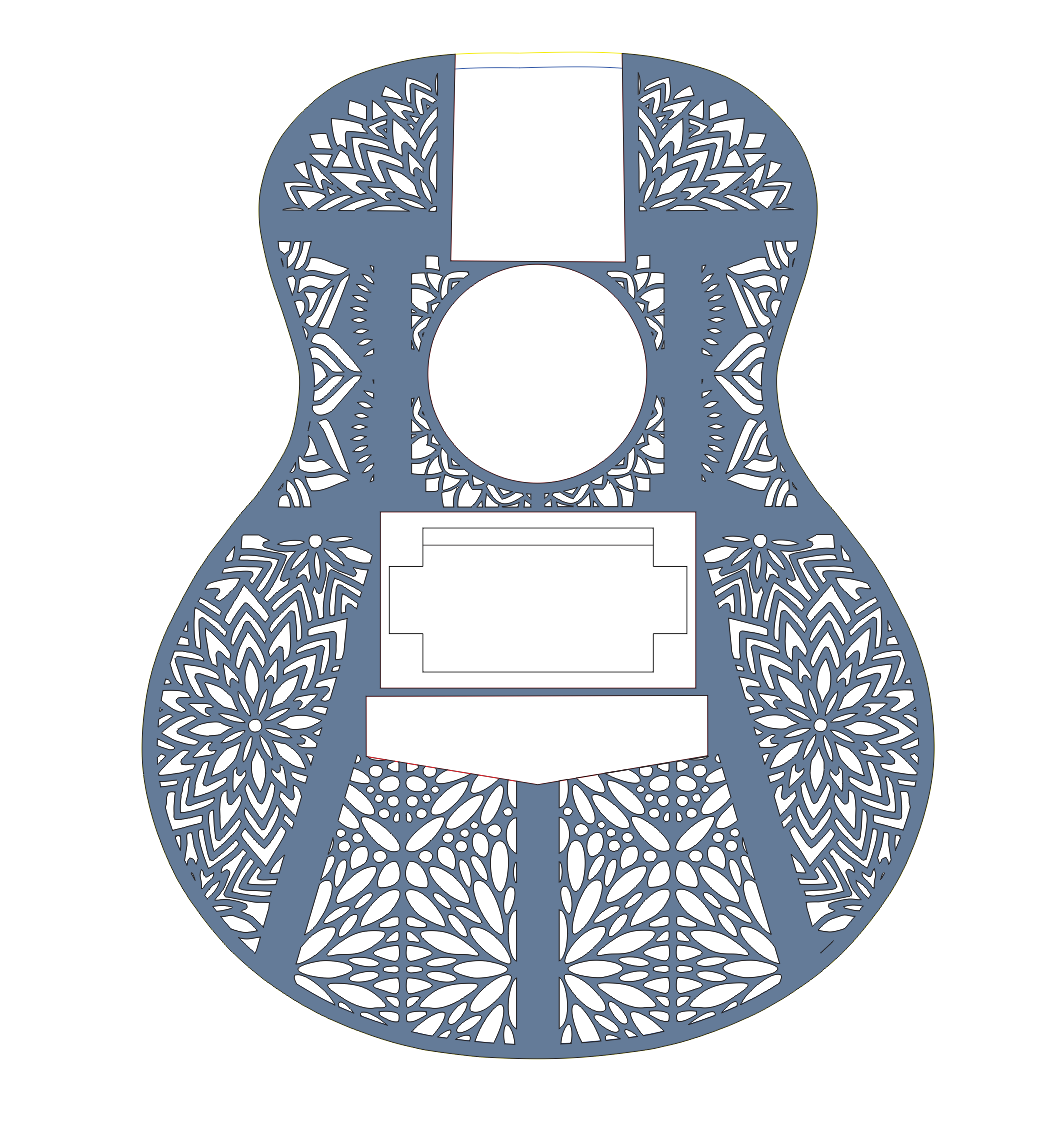
We were then able to cut both the front floral pattern and a back access hole on a laser cutter. The resulting pattern was too fragile to use on its own, so I covered the front of the uke with painter's tape and poured a bunch of clear casting epoxy in from the back.
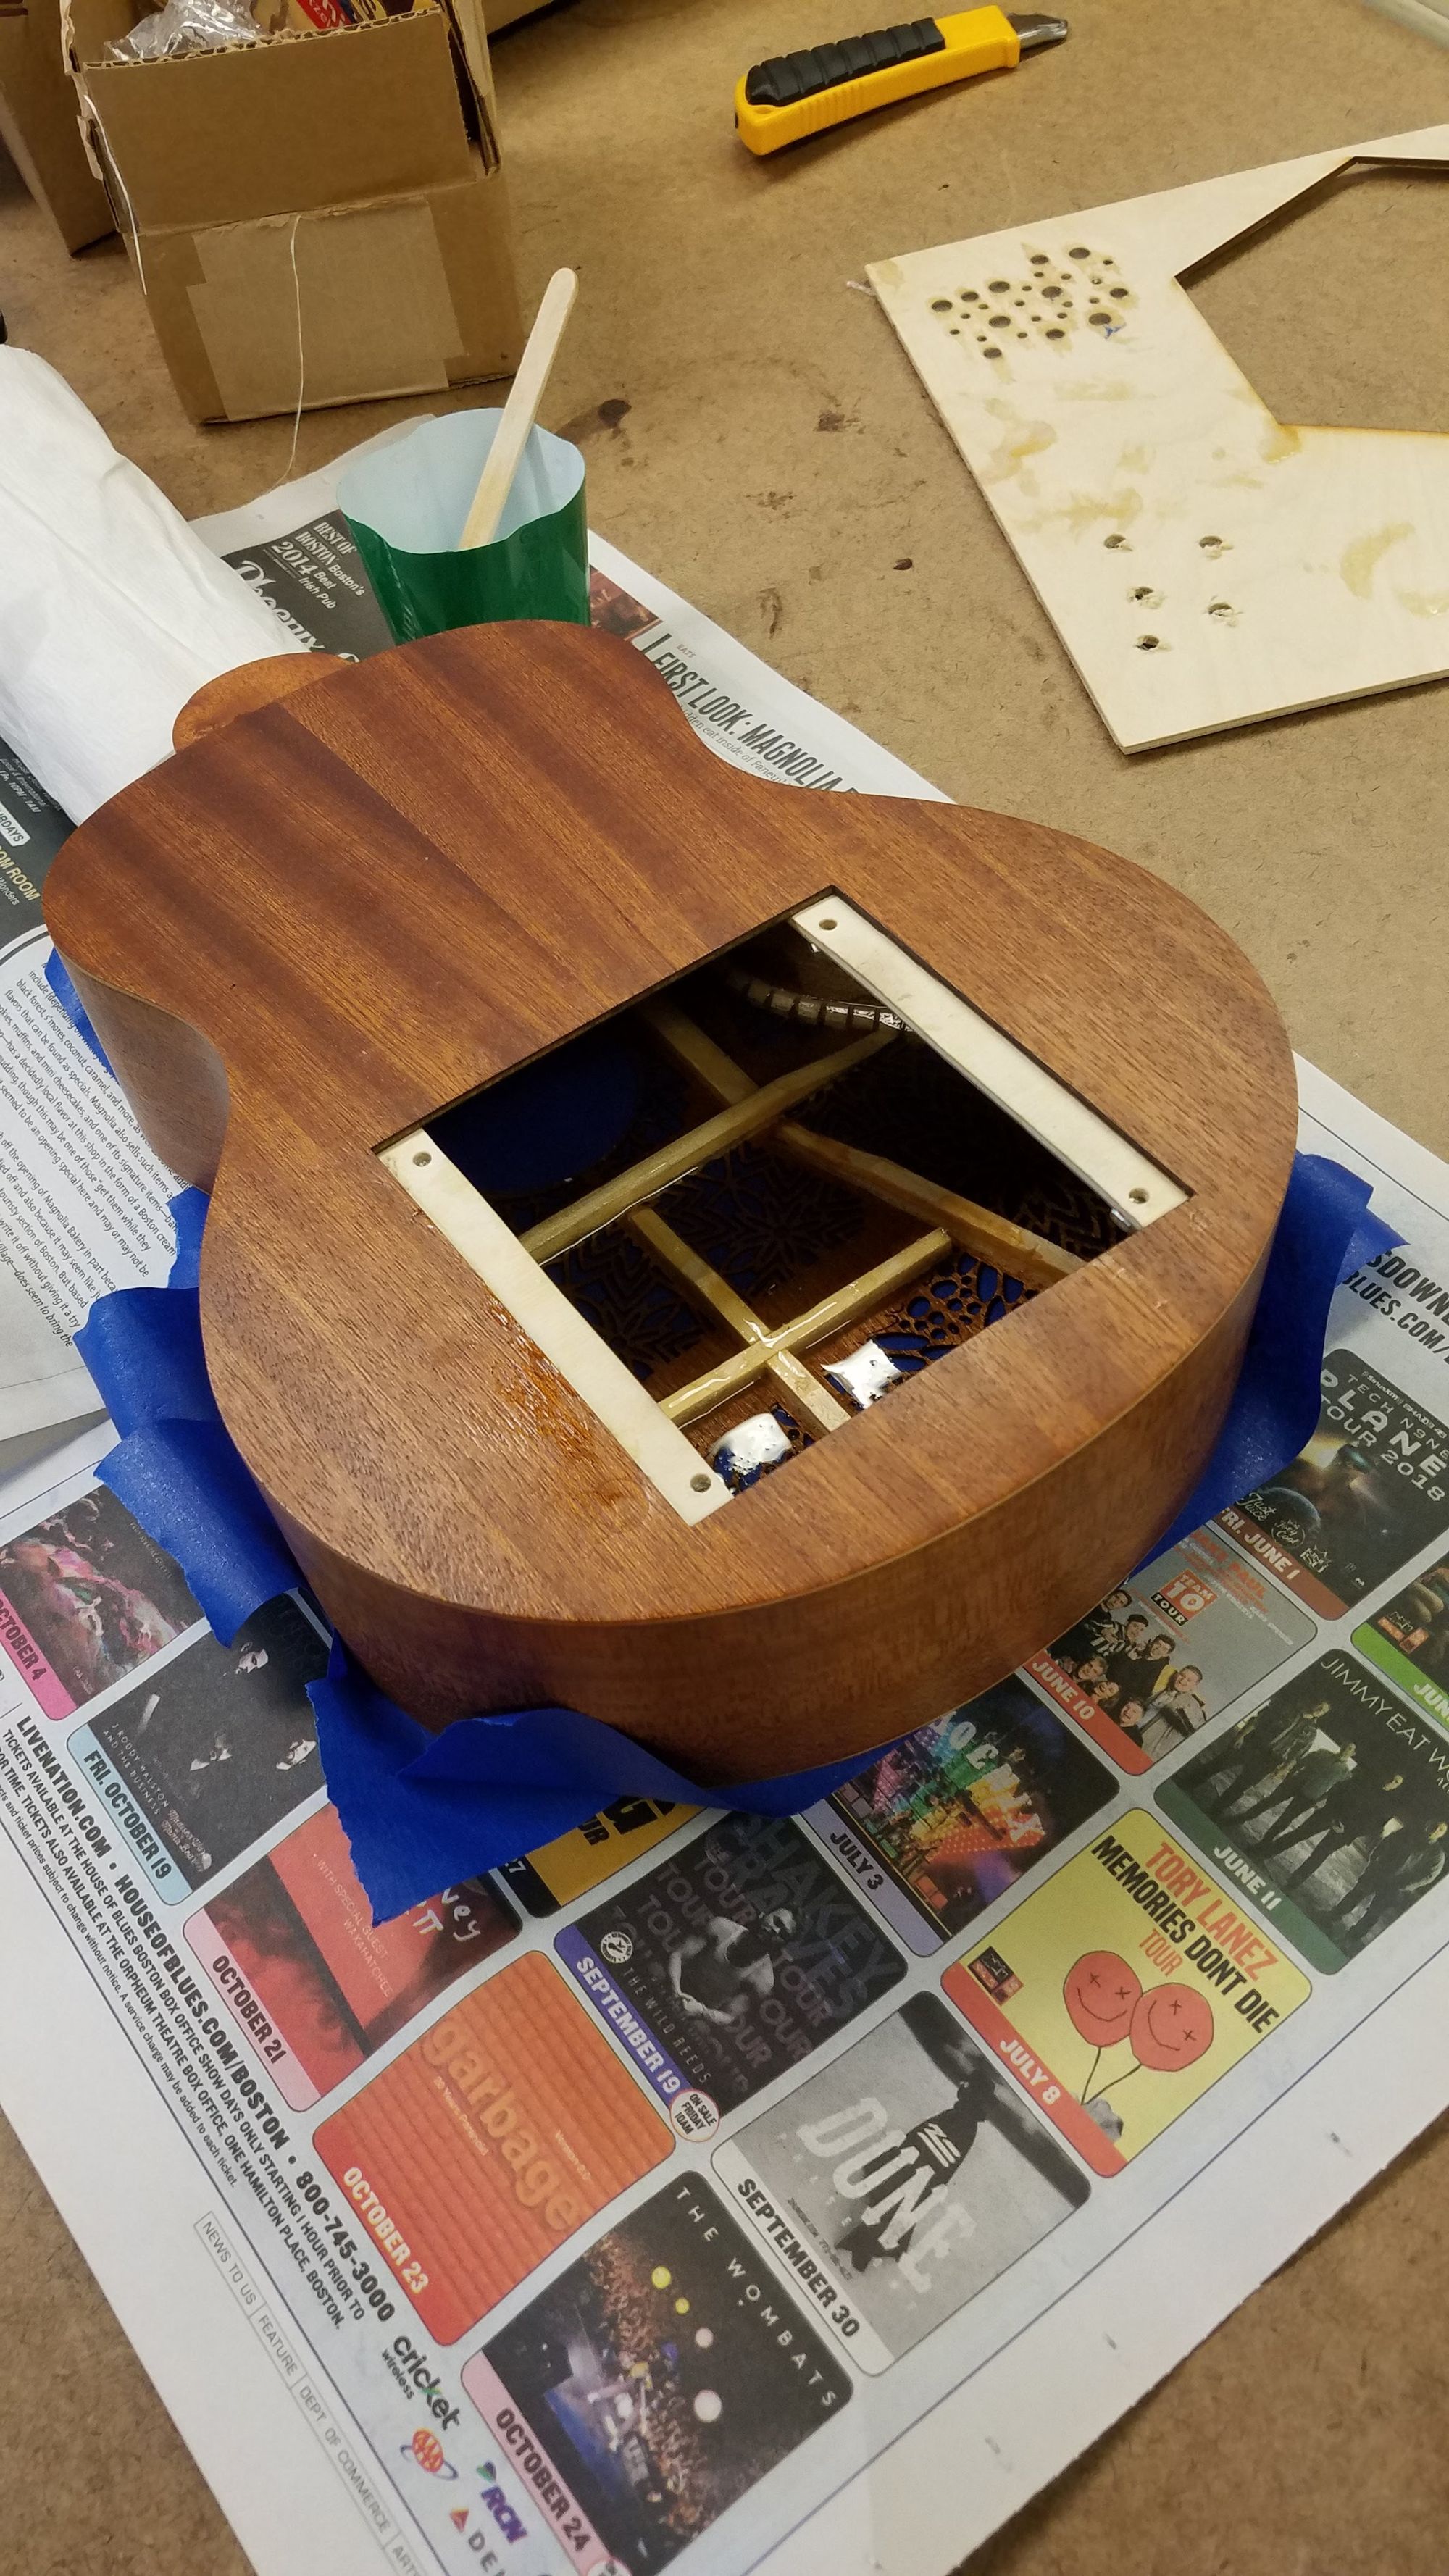
After letting it cure and removing the tape, I gave the front side a light sand, removed the epoxy that had seeped around the tape, and did another pour over the top surface to smooth everything out. Since I had poured epoxy into the sound hole, I drilled a bunch of small holes and twisted it out, sanding away the leftovers.
We then painted the inside white to better reflect the light from the LEDs and drilled holes for a tone and volume knob, as well as a 1/4" jack. I laser cut a small mounting plate for a magnetic pickup and wired all the audio stuff, leaving two unconnected wires for any weak attempt at signal processing using a Teensy.
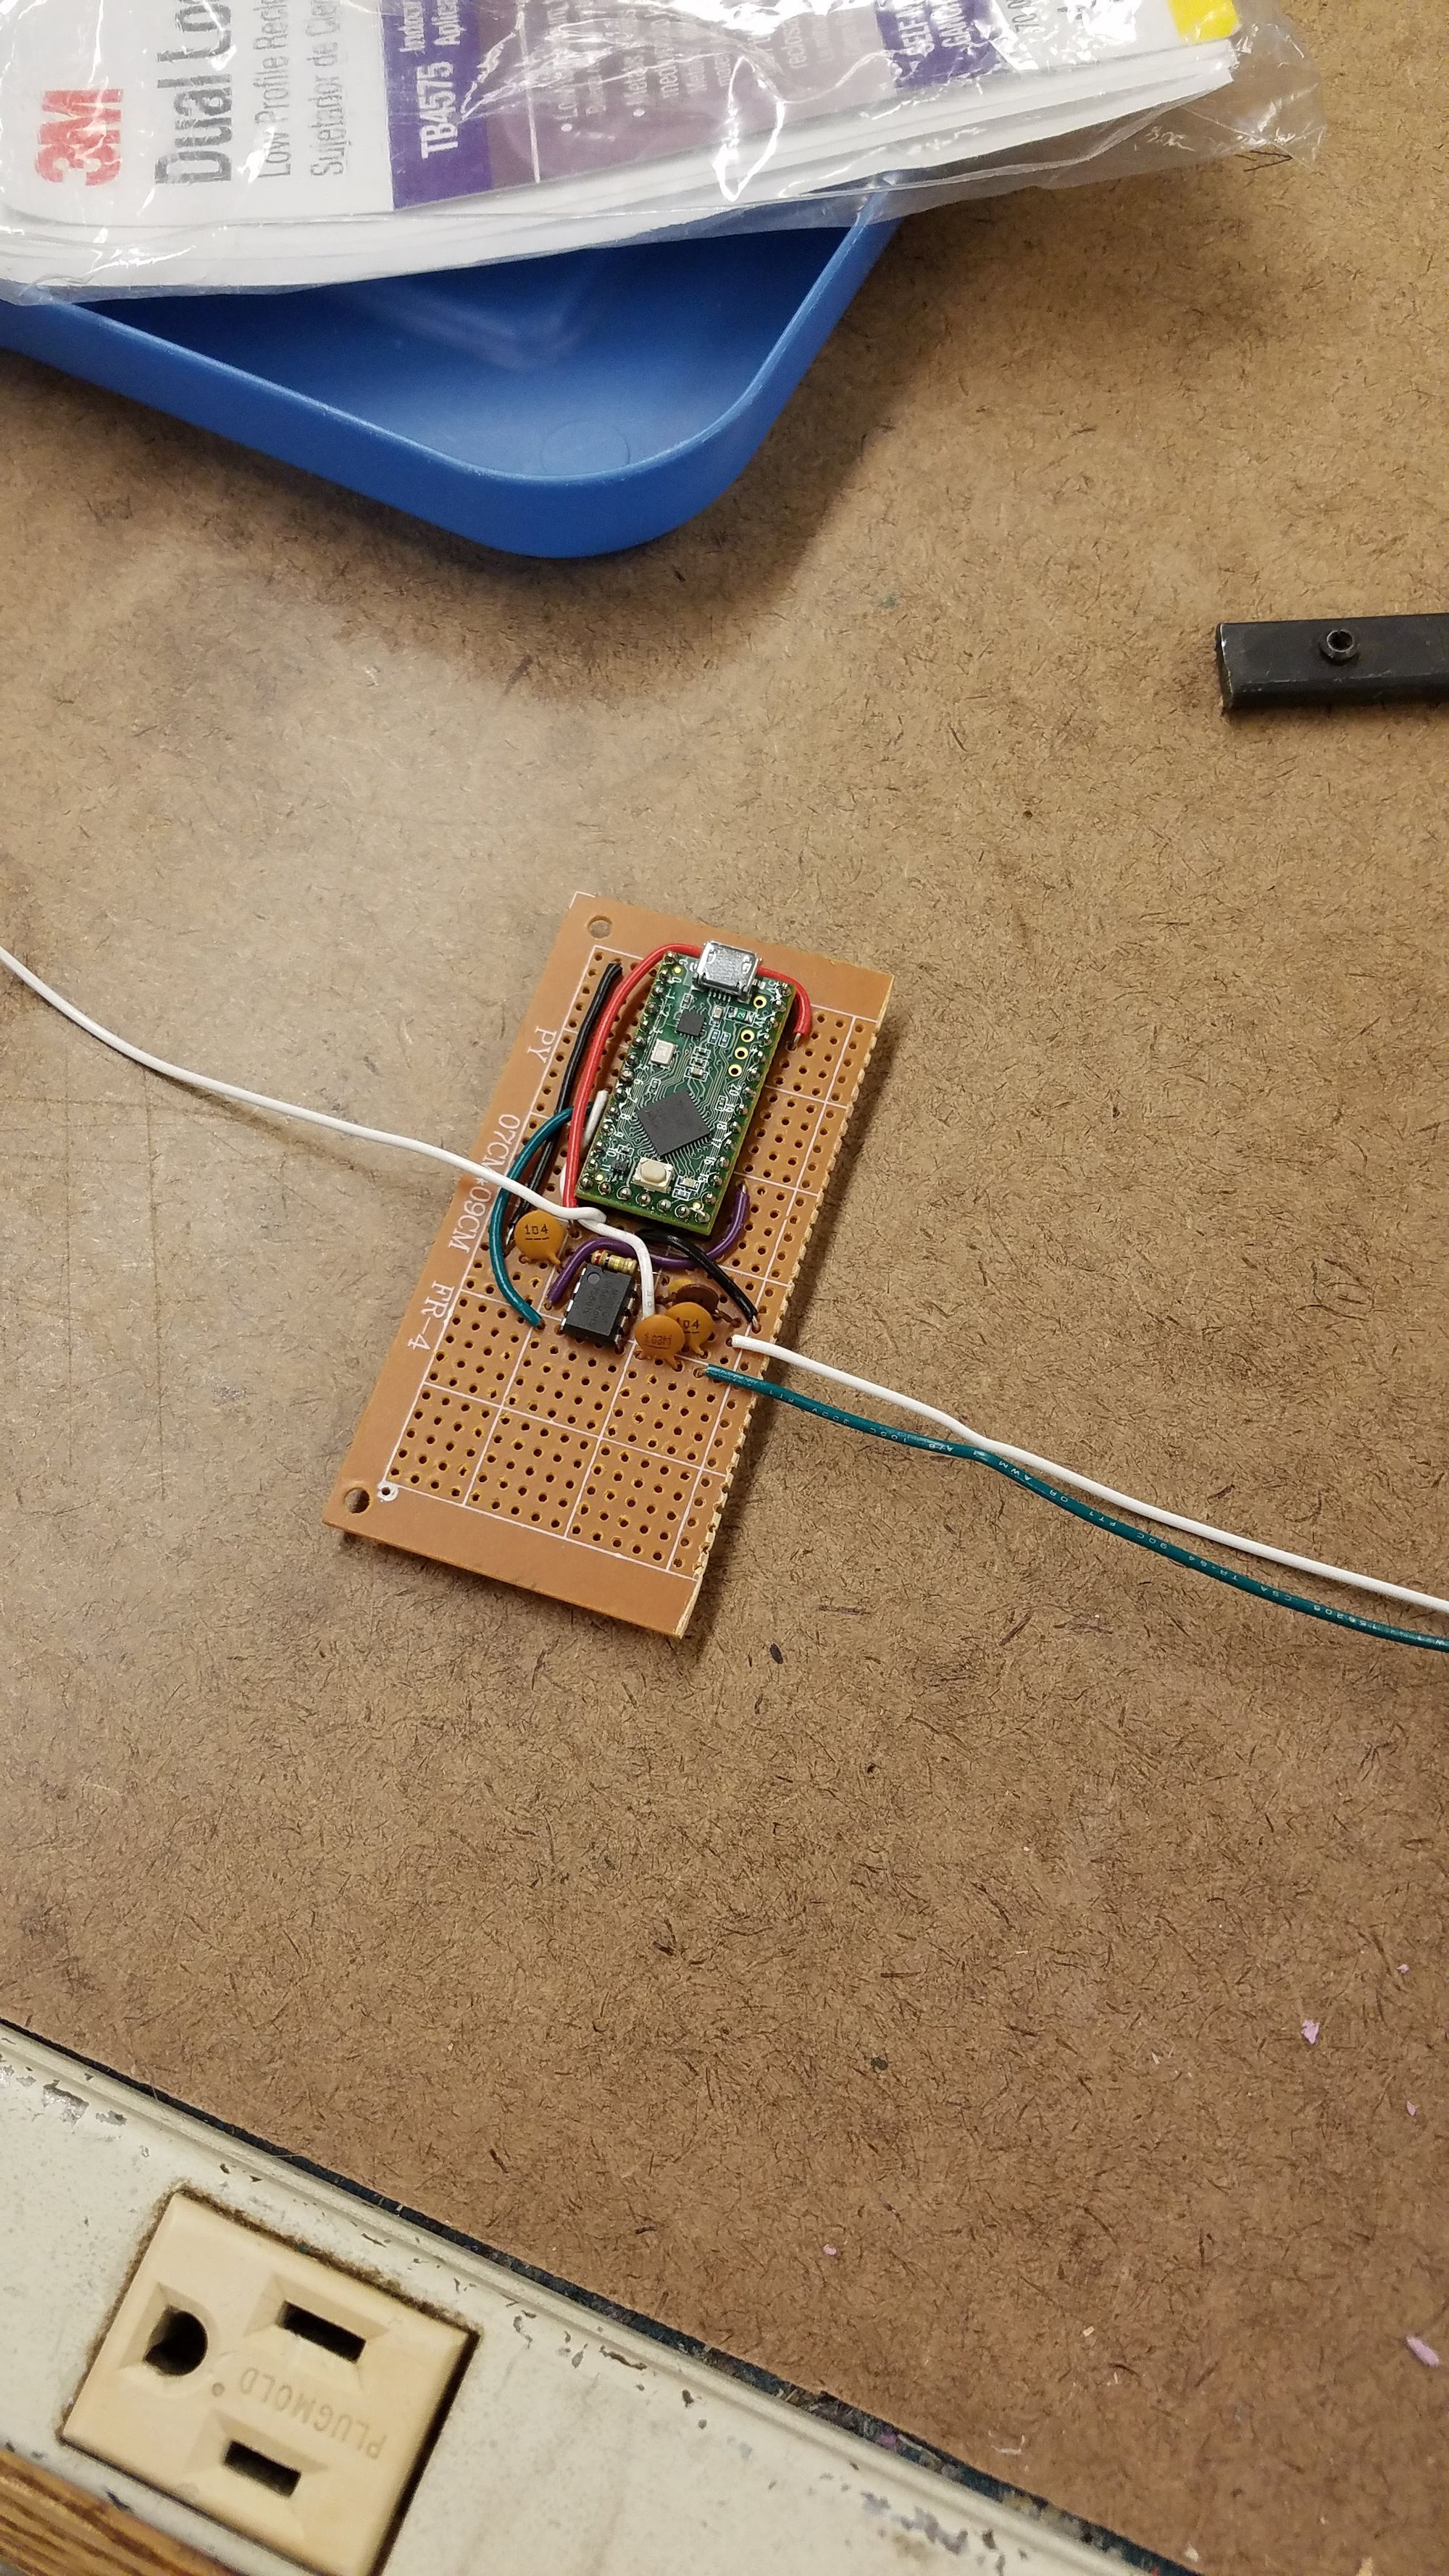
Instead of obtaining frequency and intensity data by running a FFT on whatever weak microcontroller we decided to use, we instead opted to use a MSGEQ7, a seven band "graphic equalizer" IC. This convenient little chip contains 7 band pass filters, each paired to a peak detector. These outputs are then multiplexed together.
I built the reference design for the MSGEQ7 on a breadboard, made sure it worked with the pickup, then moved both the Teensy and the MSGEQ7 onto a perfboard, including connections for power, data for the LEDs, and the signal from the pickup.
We taped and glued the LED strip into the uke after it was cut to length, and after wiring it all together, all we had to do was mess around with the code. I figured out which of the frequency buckets were represented the most in the range of the ukulele; since there were three, I mapped each one to red, green, or blue. In code, I polled the chip to get the values in each of the 7 frequency buckets, and then just set all the LEDs of the strip to the color given by the three buckets that actually show up. The colors ended up being pretty washed out, so I messed around with the scaling a bunch in order to make the colors more pronounced.
Unsurprisingly, the magnetic pickup also picks up noise from the LED strip. We tried to alleviate the problem by shielding the pickup with a bunch of copper tape and twisting pairs of wire, but we couldn't completely eliminate the problem. When plugged into an amp, it produces a B5, around 1000 Hz. While none of the values on the datasheet for the LEDs match this exactly, the PWM frequency of the LEDs is supposed to be 1.2 kHz, which is sorta close and would explain all the interference. If you rotate the pickup 90 degrees, the noise mostly goes away, further suggesting that it's the LED strip causing this issue. This was sort of unfortunate, but the uke is still pretty cool, even if you can't use both the lights and an amp at the same time.
Since I'm now out of things to say, here's some cool pictures:
